接上文《使用 k3s 搭建 cilium + istio 实验环境》和 《istio-ingressgateway 学习》
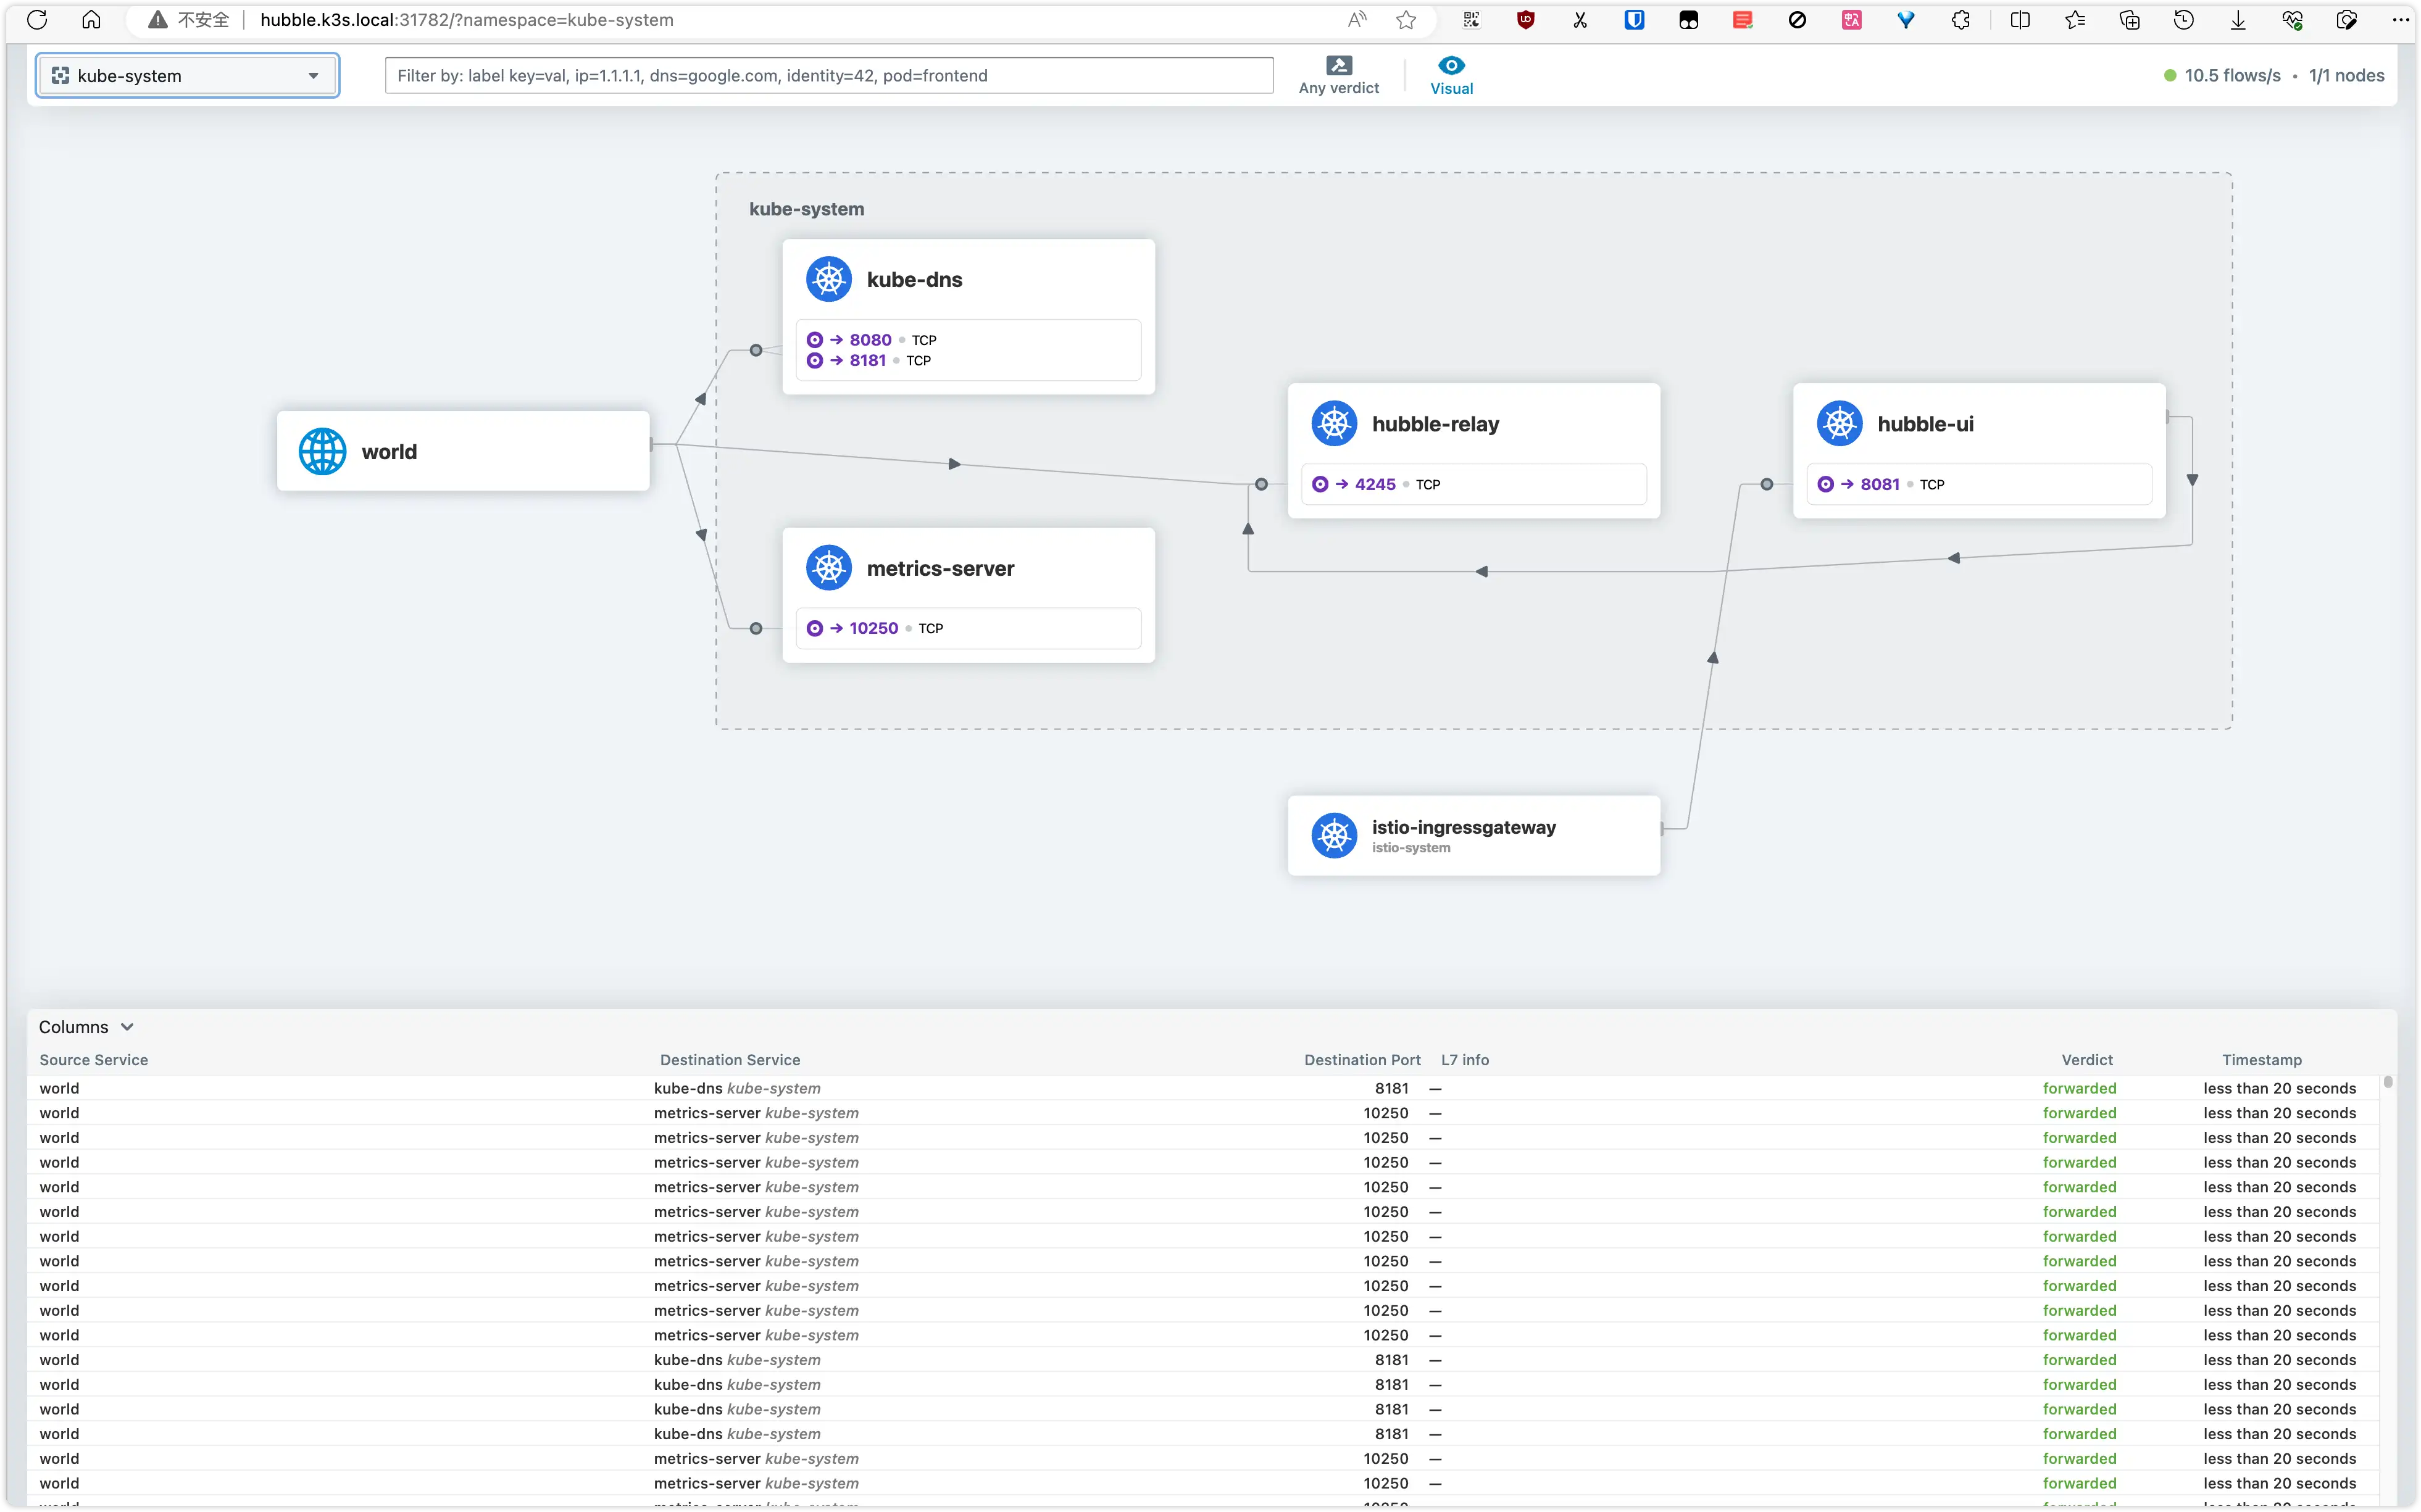
一、暴露 hubble ui
通过 istio-ingressgateway 暴露 hubble ui 服务,执行以下步骤:
 1
 2
 3
 4
 5
 6
 7
 8
 9
10
11
12
13
14
15
16
17
18
19
20
21
22
23
24
25
26
27
28
29
30
31
32
33
34
35
|
kubectl apply -f - <<EOF
apiVersion: networking.istio.io/v1alpha3
kind: Gateway
metadata:
 name: istio-gateway
spec:
 selector:
   istio: ingressgateway # use Istio default gateway implementation
 servers:
 - port:
     number: 80
     name: http
     protocol: HTTP
   hosts:
   - "hubble.k3s.local"
---
apiVersion: networking.istio.io/v1alpha3
kind: VirtualService
metadata:
 name: hubble-vs
spec:
 hosts:
 - "hubble.k3s.local"
 gateways:
 - istio-gateway
 http:
 - match:
   - uri:
       prefix: /
   route:
   - destination:
       port:
         number: 80
       host: hubble-ui.kube-system.svc.cluster.local
EOF
|
hubble ui 通过sub path 子路径这种访问方式有问题,这里通过子域名的方式访问,在本机 hosts 文件 配置如下内容
1
2
|
# istio-ingressgateway
vpsIP hubble.k3s.local
|
浏览器访问http://hubble.k3s.local:31782/(31782 为 istio-ingressgateway 的nodeport)

二、实验测试
1. Star Wars demo
部署 cilium 官方示例实例: Star Wars Demo , 官方的 yaml 没有 arm 版本的镜像,这里稍作修改:
 1
 2
 3
 4
 5
 6
 7
 8
 9
10
11
12
13
14
15
16
17
18
19
20
21
22
23
24
25
26
27
28
29
30
31
32
33
34
35
36
37
38
39
40
41
42
43
44
45
46
47
48
49
50
51
52
53
54
55
56
57
58
59
60
61
62
63
64
65
|
kubectl apply -f - <<EOF
---
apiVersion: v1
kind: Service
metadata:
 name: deathstar
 labels:
   app.kubernetes.io/name: deathstar
spec:
 type: ClusterIP
 ports:
 - port: 80
 selector:
   org: empire
   class: deathstar
---
apiVersion: apps/v1
kind: Deployment
metadata:
 name: deathstar
 labels:
   app.kubernetes.io/name: deathstar
spec:
 replicas: 2
 selector:
   matchLabels:
     org: empire
     class: deathstar
 template:
   metadata:
     labels:
       org: empire
       class: deathstar
       app.kubernetes.io/name: deathstar
   spec:
     containers:
     - name: deathstar
       image: docker.io/yuspin/starwars
---
apiVersion: v1
kind: Pod
metadata:
 name: tiefighter
 labels:
   org: empire
   class: tiefighter
   app.kubernetes.io/name: tiefighter
spec:
 containers:
 - name: spaceship
   image: docker.io/wrype/netperf-latest
---
apiVersion: v1
kind: Pod
metadata:
 name: xwing
 labels:
   app.kubernetes.io/name: xwing
   org: alliance
   class: xwing
spec:
 containers:
 - name: spaceship
   image: docker.io/wrype/netperf-latest
EOF
|
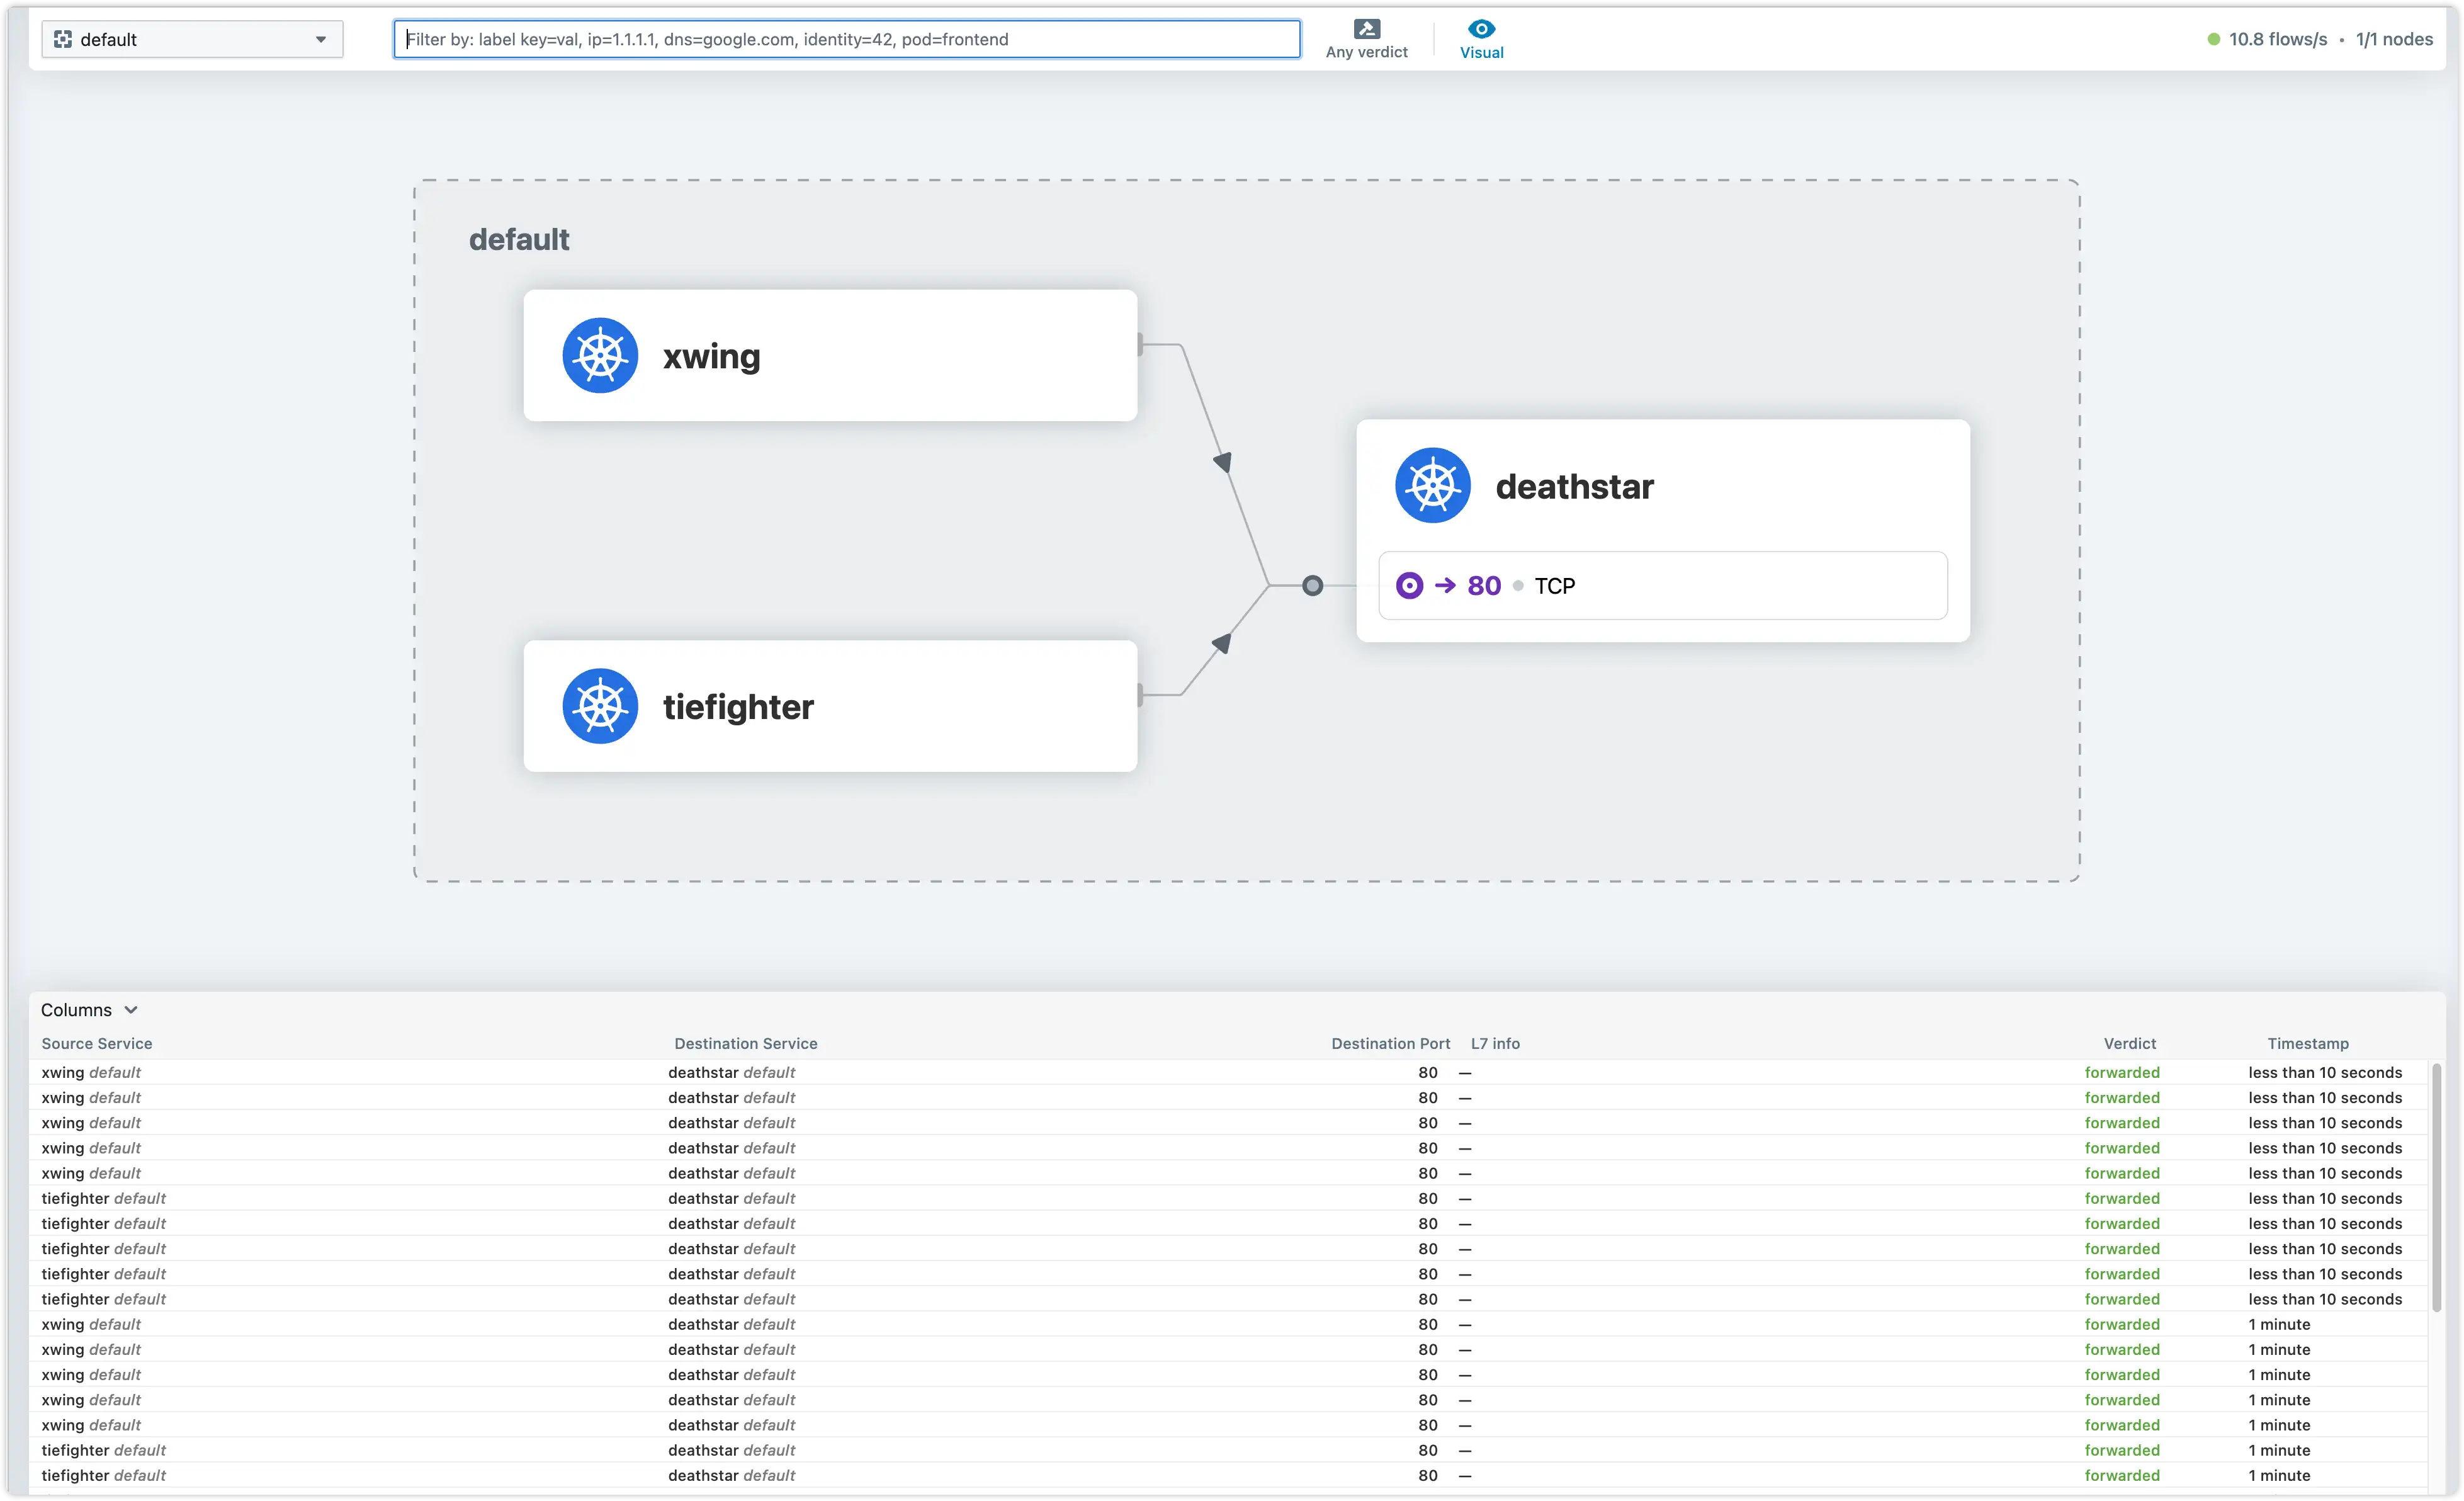
成功部署后,从两个宇宙飞船发出请求以模拟 一些流量。
1
2
3
4
5
|
$ kubectl exec xwing -- curl -s -XPOST deathstar.default.svc.cluster.local/v1/request-landing
Ship landed

$ kubectl exec tiefighter -- curl -s -XPOST deathstar.default.svc.cluster.local/v1/request-landing
Ship landed
|
然后这些请求将在 hubble ui 显示为不同的 pod 间的服务调用

2. 检查各种网络流量
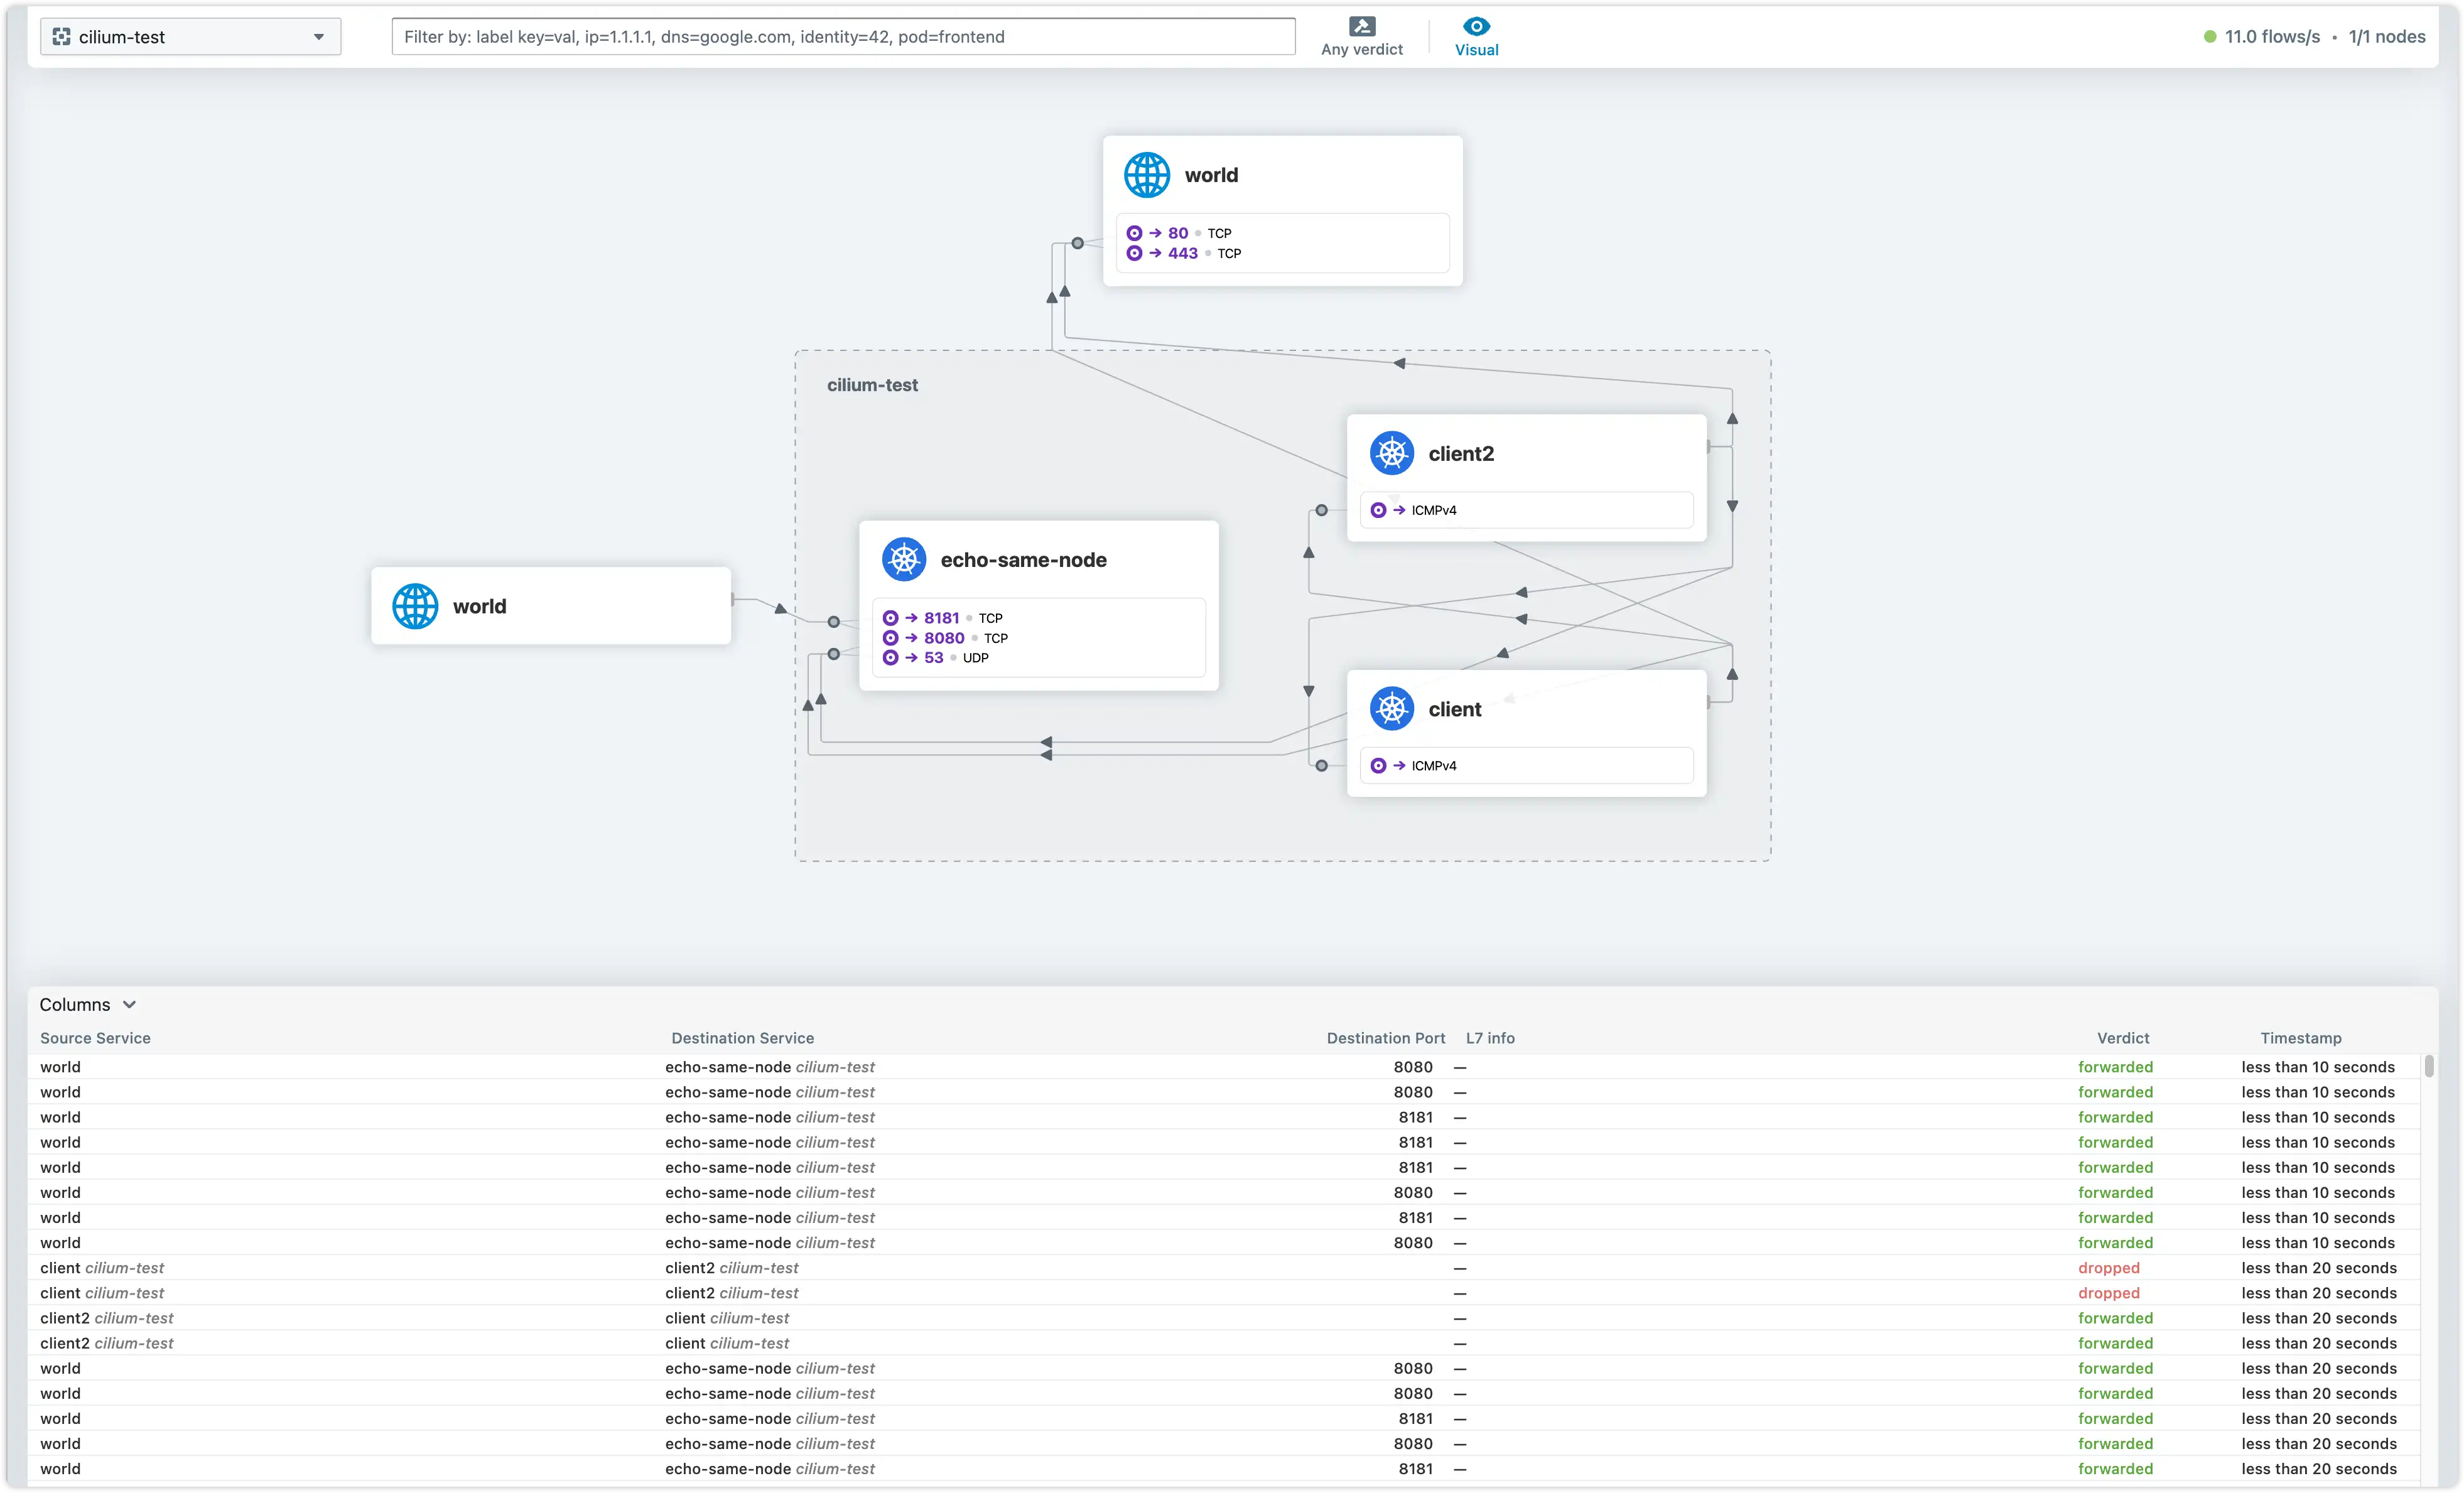
为了制造一些网络流量,循环运行 cilium 的连通性检测程序
1
|
while true; do cilium connectivity test; done
|
然后可以在 hubble ui,看到各种网络流量


